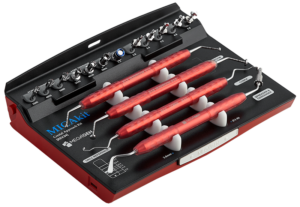
What is Densah? What is it needed for?

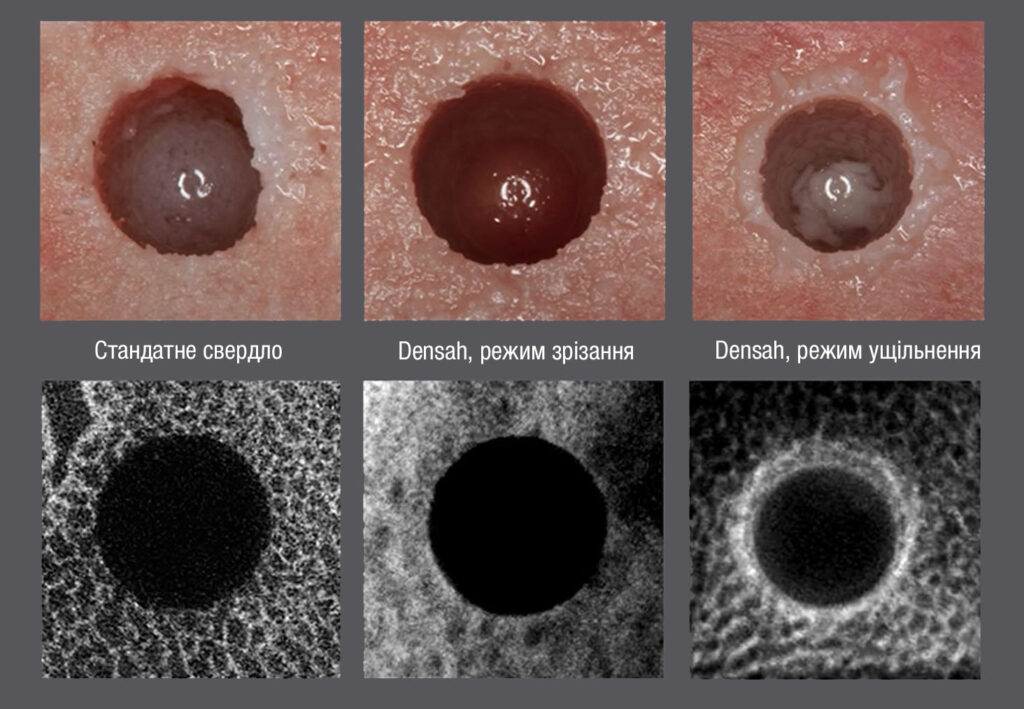
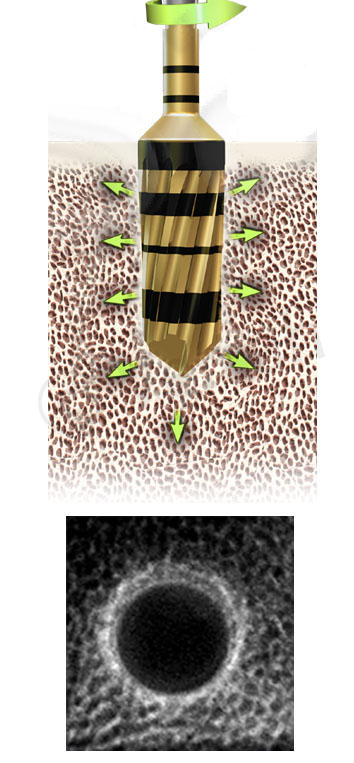
  • Bone compaction. With the 3rd and 4th bone types, the implant often cannot be fixed with the proper torque. Primary stability of the implant is one of the primary requirements for modern implantation. Densah burs allow uniform bone compaction and greater primary stability without disrupting bone tissue structure
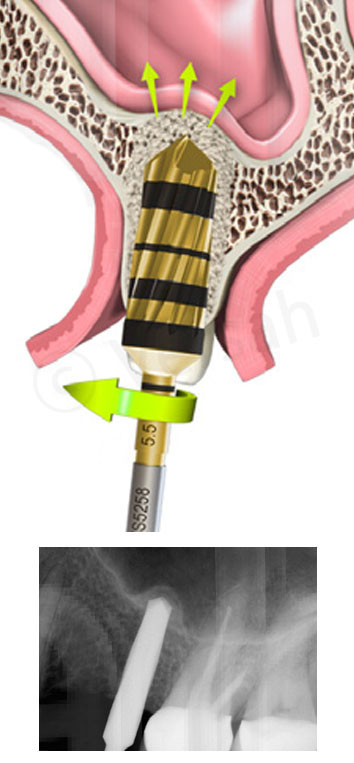
  • Closed sinus lifting. Densah burs allow you to carry out closed sinus lifting without contact of the bur with Schneider’s membrane up to a height of 3-4 mm
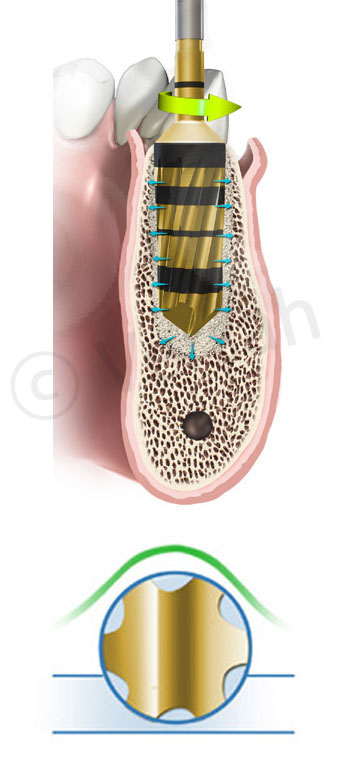
  • Comb splitting. Perform a safe crest split with vestibular displacement of the bone

Osseodensification

Sinus-lift

Ridge split

Bone compaction protocol

  • Determine the approximate type of bone tissue
  • In compaction mode (counter-clockwise rotation), drill to full depth
  • To compact bone tissue, set the reverse direction of rotation (reverse) on the physiodispenser, speed – 800 rpm
  • Rotation speed 800 rpm
  • Sink the drills successively to the required diameter
    • Place the implant in the bone with a higher torque

Crestal sinus lift protocol

  1. Measure bone height to sinus floor. Flap the soft tissue using instruments and technique normally used
  2. Densah Bur (2.0) OD Mode to sinus floor. Avoid using a pilot drill. Depending upon the implant type and diameter selected for the site, begin with the narrowest Densah® Bur (2.0). Change the drill motor to reverse (counterclockwise drill speed 800-1500 rpm–Densifying Mode with copious irrigation). Begin running the bur into the osteotomy until reaching the dense sinus floor. Confirm bur position with a radiograph
  3. Enter with Densah® Bur (3.0) OD mode up to 3mm past the sinus floor. Use the next wider Densah® Bur (3.0)  and advance it into the previously created osteotomy with modulating pressure and a pumping motion. When feeling the haptic feedback of the bur reaching the dense sinus floor, modulate pressure with a pumping motion to advance past the sinus floor in 1 mm increments, up to 3mm. Maximum bur advancement past the sinus floor, at any stage, must not exceed 3 mm. Bone will be pushed
    toward the apical end and will begin to gently lift the membrane and autograft compacted bone up to 3mm.  Confirm bur vertical position with a radiograph
  4. Densah Bur (4.0), (5.0) OD mode up to 3mm past the sinus floor. Use the sequential wider Densah® Burs in Densifying Mode (Counterclockwise drill speed 800-1500 rpm) with copious irrigation with pumping motion to achieve additional width with maximum membrane lift of 3 mm (in 1 mm increments) to reach final desired width for implant placement. Densah® Burs must not advance more than 3 mm past the sinus floor at all times regardless of the Densah® Bur diameter
  5. Propel allograft. After achieving the final planned osteotomy diameter, fill the osteotomy with a well hydrated, mainly cancellous, allograft. Use the last Densah® Bur used in step 4 in Densifying Mode (Counterclockwise) with low speed 150-200 rpm with no irrigation to propel the allograft into the sinus. The Densah® Bur must only facilitate the allograft material compaction to further lift the sinus membrane, and not to advance beyond the sinus floor more than 2-3 mm. Repeat the graft propelling step to facilitate additional membrane lift as needed according to implant length
  6. Place implant. Place the implant into the osteotomy. If using the drill motor to tap the implant into place, the unit may stop when reaching the placement torque maximum. Finish placing the implant to depth with a torque indicating wrench

Ridge splitting protocol

  1. Flap the soft tissue using the technique indicated for the implant position.
  2. It is advised to prepare the osteotomy 1.0 mm deeper than the final implant length, using
    the Pilot Drill (Drill speed 800-1500 rpm with copious irrigation)
  3. Depending upon the implant type and diameter selected for the site, begin with the narrowest
    Densah® Bur. Set the drill motor to reverse (Counterclockwise drill speed 800-1500 rpm with
    copious irrigation). Begin running the bur into the osteotomy. When feeling the haptic feedback of the
    bur pushing up out of the osteotomy, modulate pressure with a pumping motion until
    reaching the desired depth. You may notice resistance and a gentle hammering effect while pressing
    down to advance the bur into the osteotomy
  4. Densify – Preserve) after Cut (DAC) if needed: When strong resistance may be felt.
    Change the drill motor to forward-Cutting Mode (Clockwise direction at 800-1500 rpm
    with copious irrigation). Begin advancing the Densah® Bur into the osteotomy until reaching the
    desired depth. Stay in the osteotomy, change the drill motor back to reverse-Densifying
    Mode to densify and auto-graft the cut bone back into the osteotomy walls. By not removing the
    bur from the osteotomy between cutting and densifying modes, you will re-deposit the cut bone
    particles inside the boundaries of the osteotomy. (See page 29 for illustration.)
  5. Place the implant into the osteotomy. If using the drill motor to tap the implant into place, the unit
    may stop when reaching the placement torque maximum. Finish placing the implant to depth with
    a torque indicating wrench
  6. Osseodensification in Dense trabecular bone is only recommended to be utilized to expand a less
    than adequate ridge width in the Mandible
  7. In abundant dense bone: Densah Bur may be used in Cutting Mode (800-1500 RPM) in Clockwise
    direction or to be used with Densify-Preserve after Cut protocol

    Naručite specijalističku konzultaciju

    Price of Densah Bur – 125 

    We Recommend

    AO

    AO

    AnyOne – the main implant in a dental clinic
    Knife Thread
    Xpeed surface
    AR

    AR

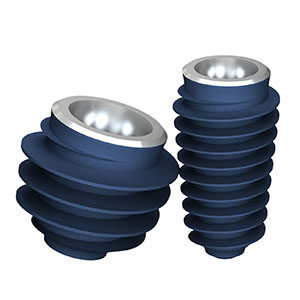
    AnyRidge
    The best implant in the world for immediate loading
    A single prosthetic platform
    Xpeed surface